Woodworking jointers are essential tools for anyone looking to create smooth, flat surfaces on lumber. These machines are designed to level and square the edges of boards, making them ready for assembly or further processing. Understanding how jointers work and their various components can help you make the most of this valuable piece of equipment.
A jointer features a flat in-feed table and a flat out-feed table, which work in tandem to guide the wood through the cutting mechanism. The cutter head, equipped with sharp knives, shaves off thin layers from the surface of the board. This process removes any twists, cups, or warps that might be present, resulting in a perfectly flat edge. By feeding the wood through in a controlled manner, you ensure that each pass builds upon the last, creating a smooth and even finish.
One key aspect to understand is the difference between a jointer and a planer. While a jointer flattens and straightens the edges of the wood, a planer is used to reduce the thickness of boards, ensuring that both faces of the wood are parallel. Together, these two tools complement each other, allowing you to achieve precision in your woodworking projects.
Safety is paramount when operating a jointer. Always remember to use push sticks or blocks to keep your hands away from the cutter head. Additionally, make sure to set the depth of cut properly; a depth that is too deep can cause kickback and other dangerous situations. By respecting the equipment and following proper safety guidelines, you can enjoy a productive and safe woodworking experience.
Choosing the Right Jointer for You
When it comes to woodworking jointers, selecting the right one can feel overwhelming, especially with so many options available. To make the best choice, it's essential to understand what you need based on your projects and experience level. Whether you are a beginner or a seasoned pro, a few key factors can help guide your decision.
First, consider the size of the jointer. For hobbyists with limited workspace, a smaller benchtop model might be sufficient. These compact jointers are portable and easy to store, making them ideal for those just starting. However, if you have more room and tackle larger projects, a bigger stationary jointer will provide you with greater stability and higher performance.
Next, think about the jointer's cutting capacity. The width of the jointer bed determines how wide your boards can be processed. Most hobbyists find a 6-inch or 8-inch jointer appropriate for their needs. If you frequently work with wider stock, it may be worth investing in an 8-inch model. Besides width, consider the depth of cut; a jointer that allows for more adjustment will enable you to tackle various thicknesses effectively.
Another vital aspect is motor power. A more powerful motor can handle tougher woods and prevent bogging down during operation. Look for a jointer with at least a 1-horsepower motor for efficient performance. Finally, don’t forget to check user reviews and ratings. Hearing from others who have used the jointer can help ensure you make a well-informed investment that meets your needs.
Basic Jointer Operation Techniques
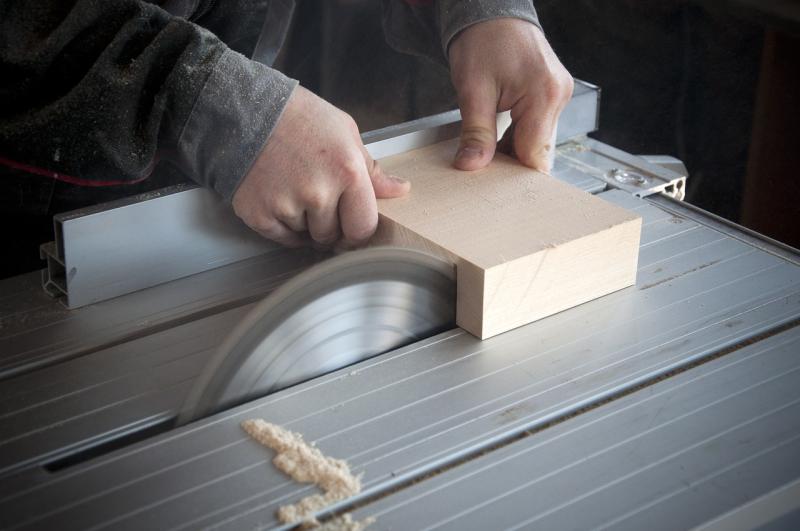
One of the first steps in basic jointer operation is to ensure your wood is properly set up for flattening. Start with wood that is relatively straight and free of major imperfections. Place the board flat on the jointer's infeed table, allowing enough length for the entire board to be supported. Adjust the fence to a 90-degree angle for square edges. As you push the board through the jointer, maintain a steady feed rate, applying even pressure along the length of the board to achieve consistent results.
Another essential technique involves selecting the right depth of cut. For beginners, it’s wise to start with a shallow cut, typically around 1/16 of an inch. This helps prevent tear-out and makes it easier to achieve a flat surface. As you gain confidence, you can gradually increase the depth. Always inspect your progress after each pass, looking for any areas that still need attention.
Mind your safety while operating the jointer. Keep your hands clear of the blades and use push sticks when dealing with smaller pieces. Maintaining a clear workspace will not only keep you safe but also ensure a smoother operation. Lastly, take your time and enjoy the process – each pass on the jointer gets you closer to producing beautiful, professional-quality wood pieces!
Maintenance Tips for Long-lasting Performance
Proper maintenance is key to ensuring your woodworking jointer offers long-lasting performance. Regular care not only prolongs the life of the tool but also helps maintain the quality of your woodworking projects. Here are some essential tips to keep your jointer in top shape.
First, always keep the blades sharp. Dull blades can lead to tear-out and uneven surfaces on your wood pieces, making your jointer less effective. Check the blades frequently for nicks and wear. If they begin to dull, take the time to sharpen them or replace them if necessary. Regular sharpening will ensure smoother cuts and a better finish on your projects.
Next, clean your jointer regularly. Sawdust and debris can accumulate in the machine and affect its performance. After each use, wipe down the surfaces, especially the infeed and outfeed tables, to prevent any buildup. Additionally, make it a habit to check and clean any internal parts as recommended in your jointer's manual. A clean machine operates more smoothly and efficiently.
Lastly, lubricate moving parts as needed. Keeping the adjustments and moving components well-lubricated allows for easier operation and prevents excessive wear and tear. Refer to the manufacturer's guidelines for the best types of lubricants to use. By following these maintenance tips, you'll help ensure that your woodworking jointer remains a reliable asset in your workshop for years to come.